Steering-Wheel Cover
Hey Peach!
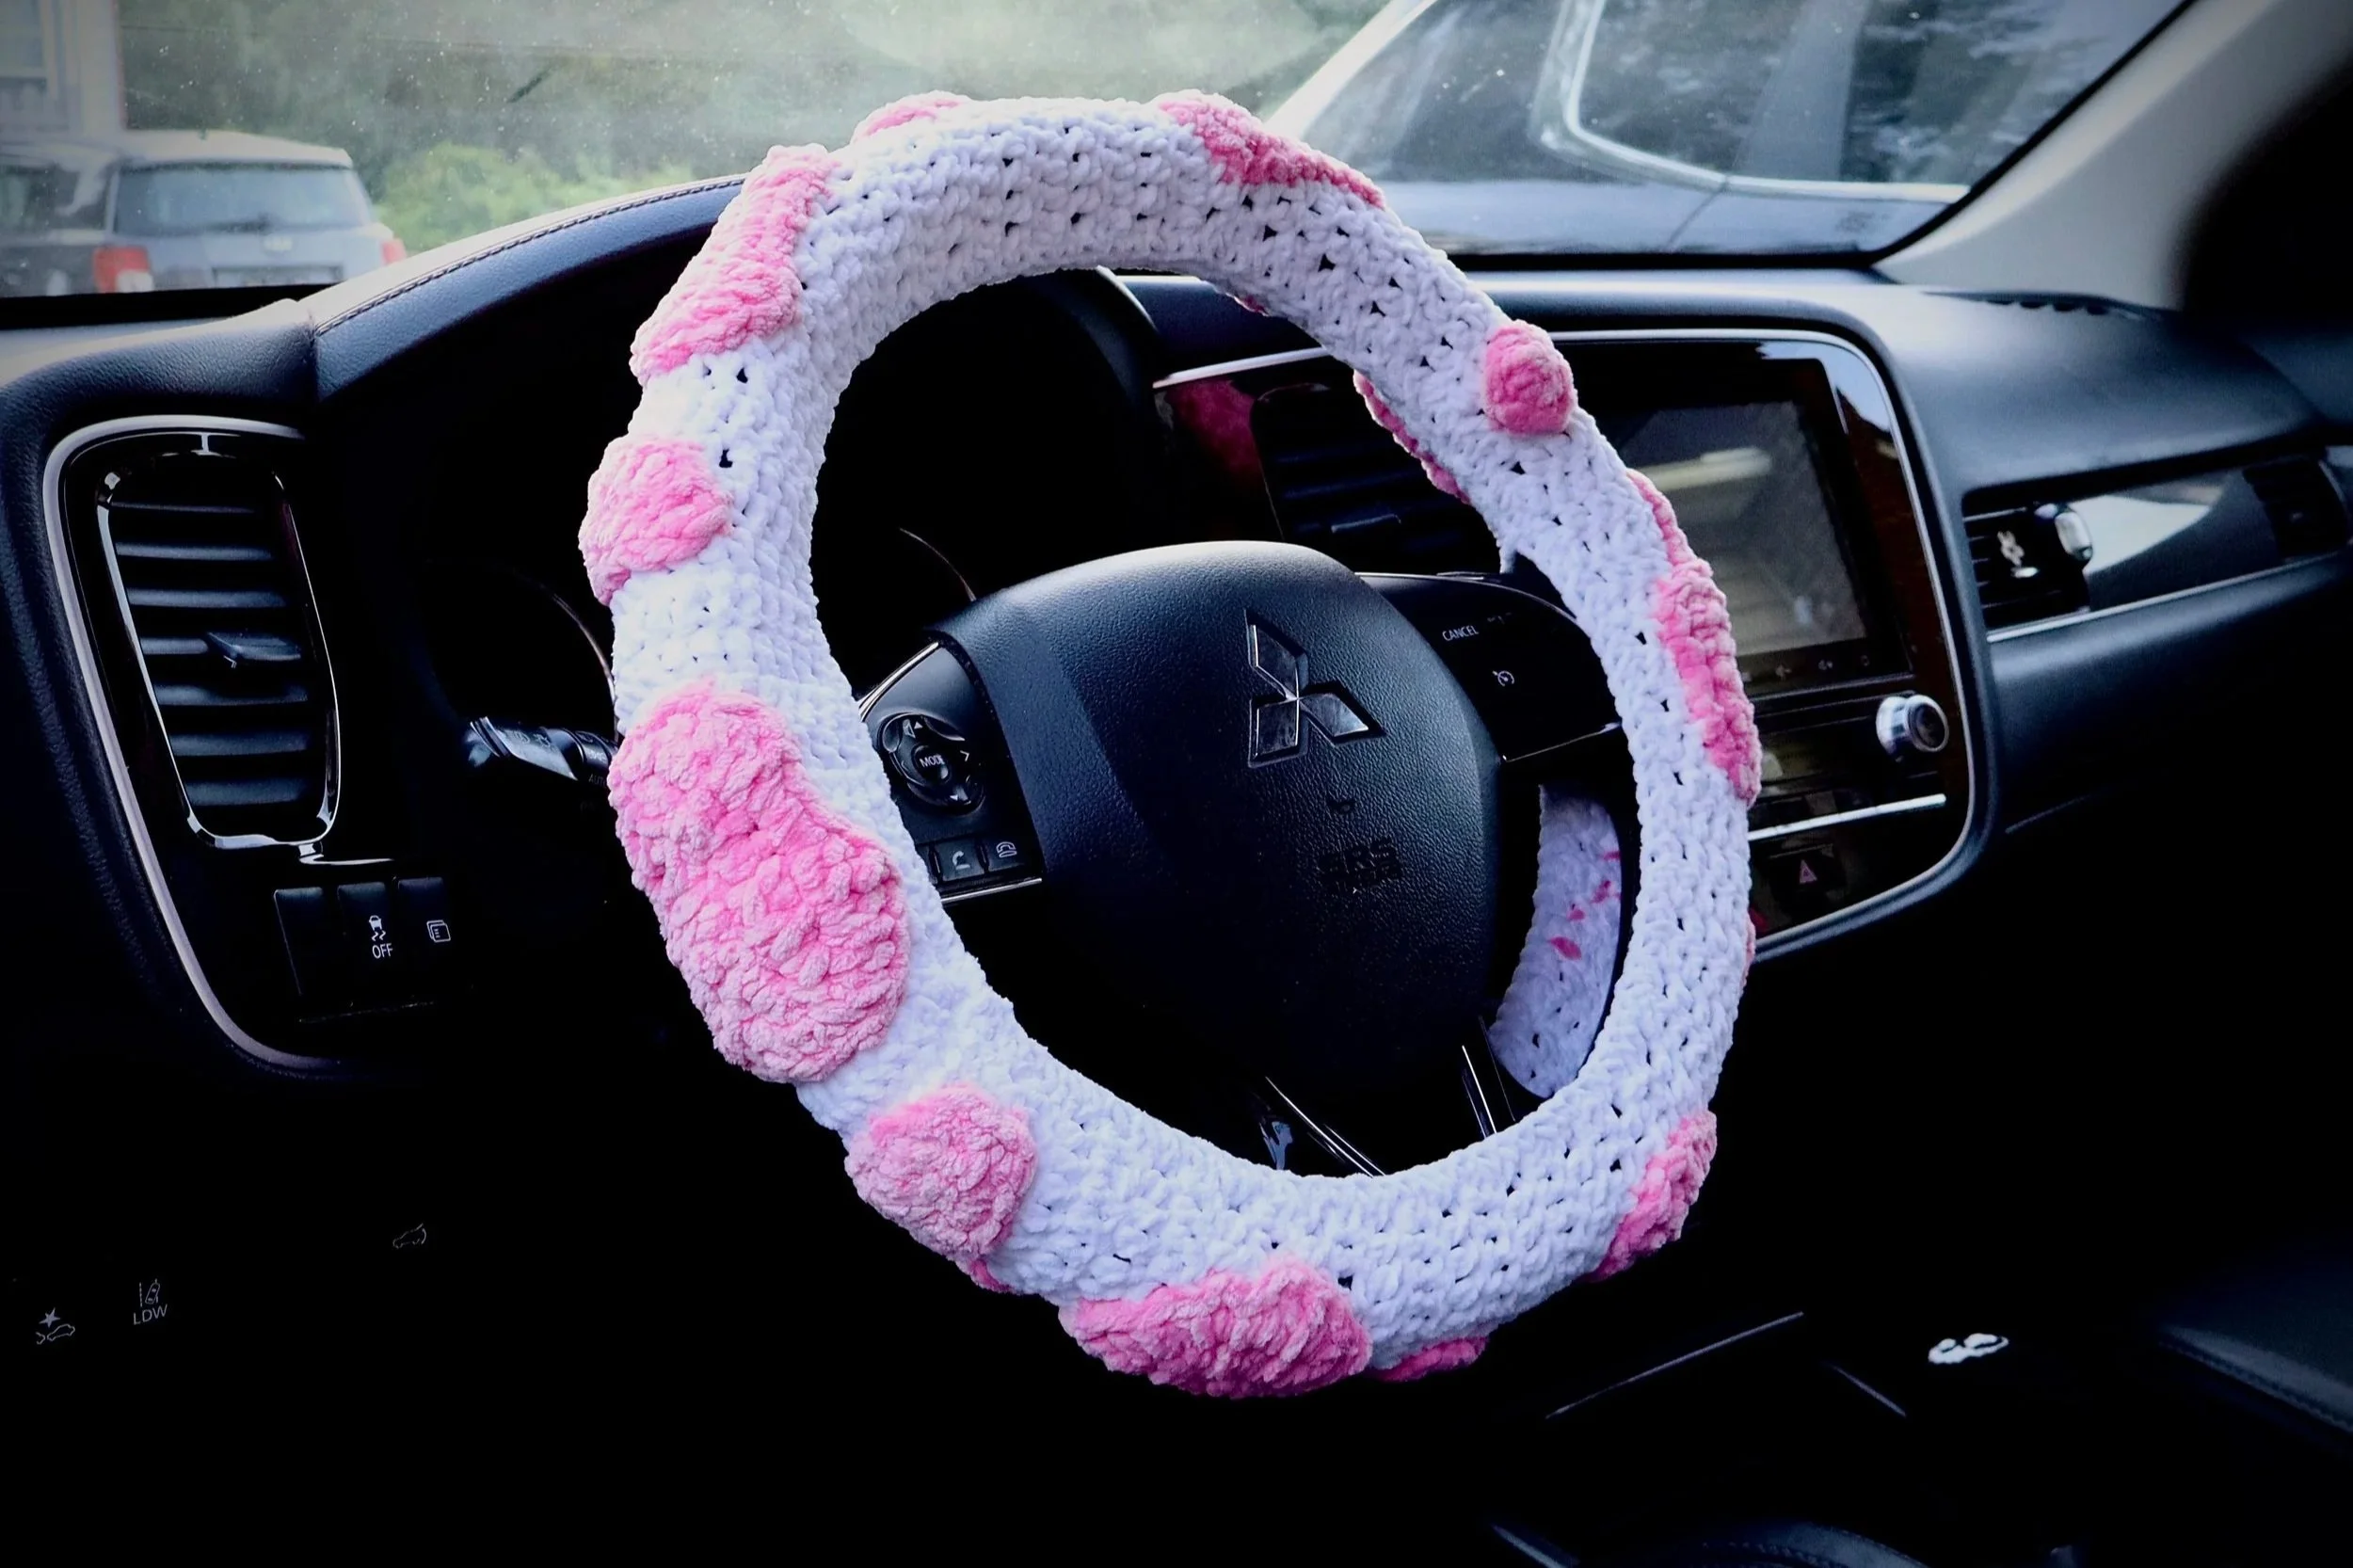
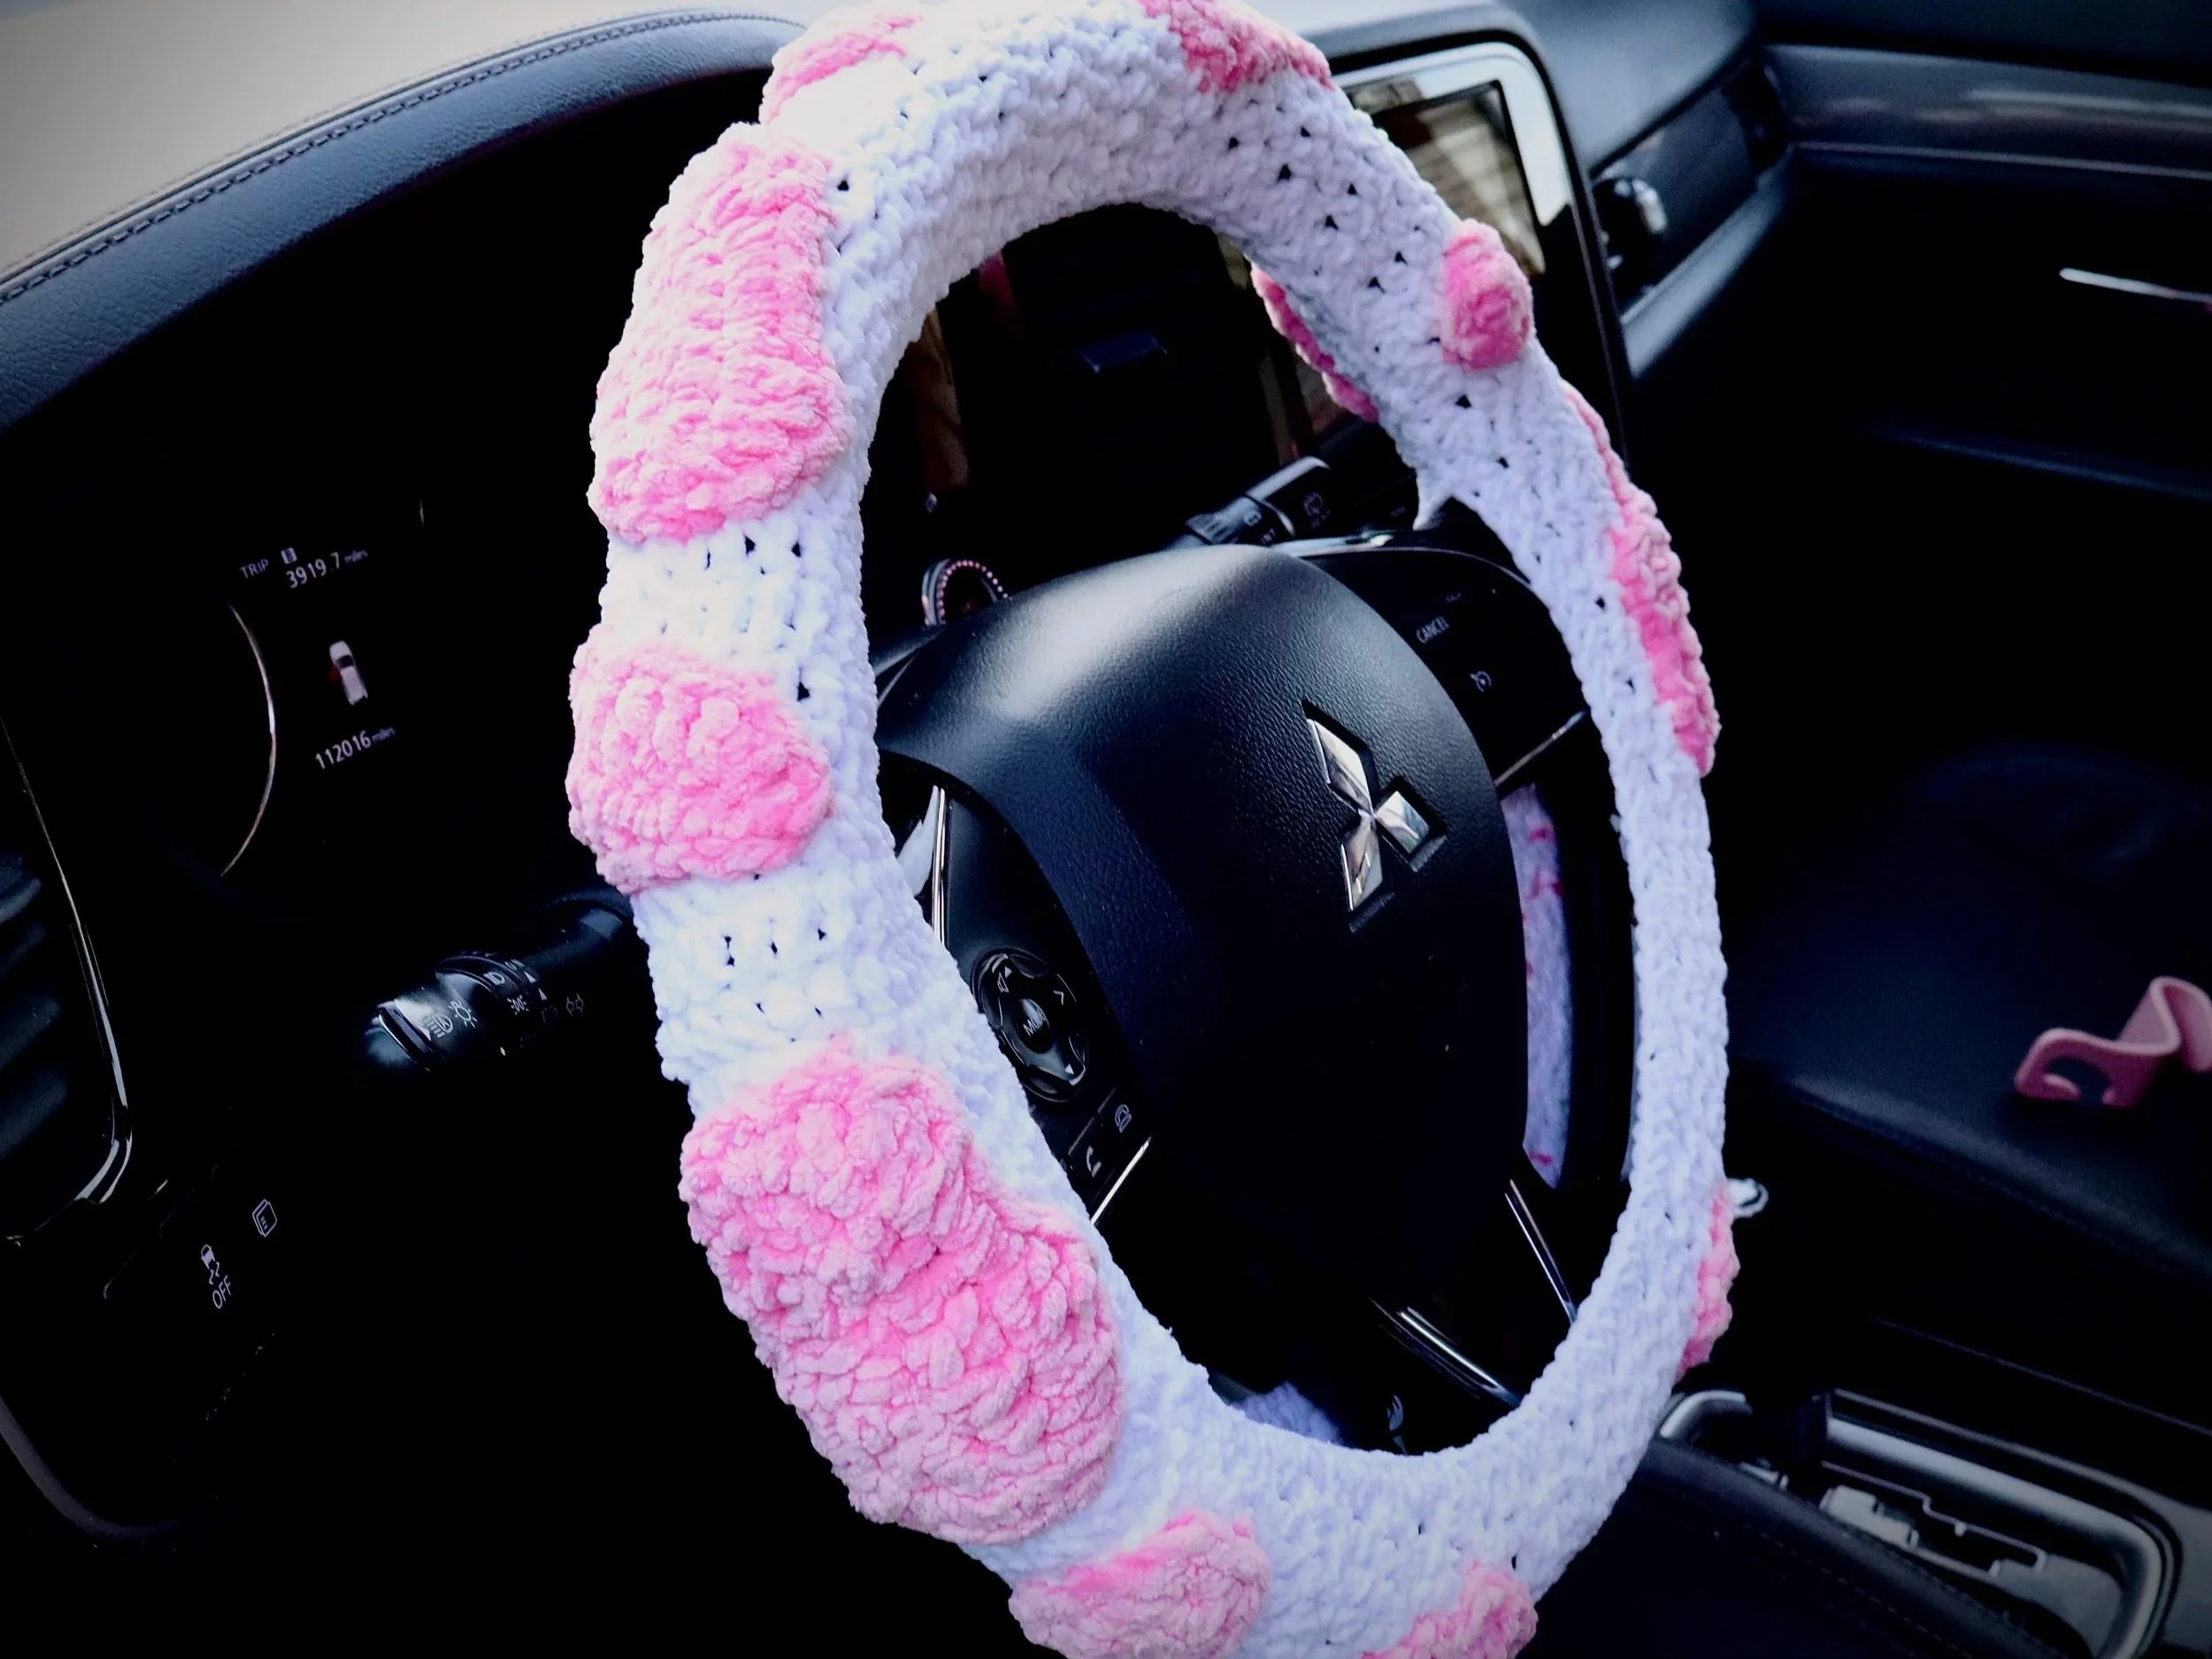
Want to learn how to make your own fully customized steering wheel cover? I have Got. You. Covered Mama! I’m currently on a mission to make strawberry-milk-cow themed accessories for my car. To say it’s going well would be an understatement.
(P.S. If you’re interested in following along, I am documenting the process in video form on my Tik Tok and Instagram.)
ANYWAYS! the tricky part about making patterns for cars is that every car has different measurements. So, instead of a step by step pattern I am going to walk you through all of the measurements you need to take, how you will utilize those measurements, and the different techniques you will use to create piece, and pull it all together at the end.
These instructions only details the base steering wheel cover (the white portion in my photos) IF you want an explanation of how I made my spots, let me know in the comments! I’m happy to create a little blurb explaining my method.
What are you waiting for? Let’s go cowgirl!
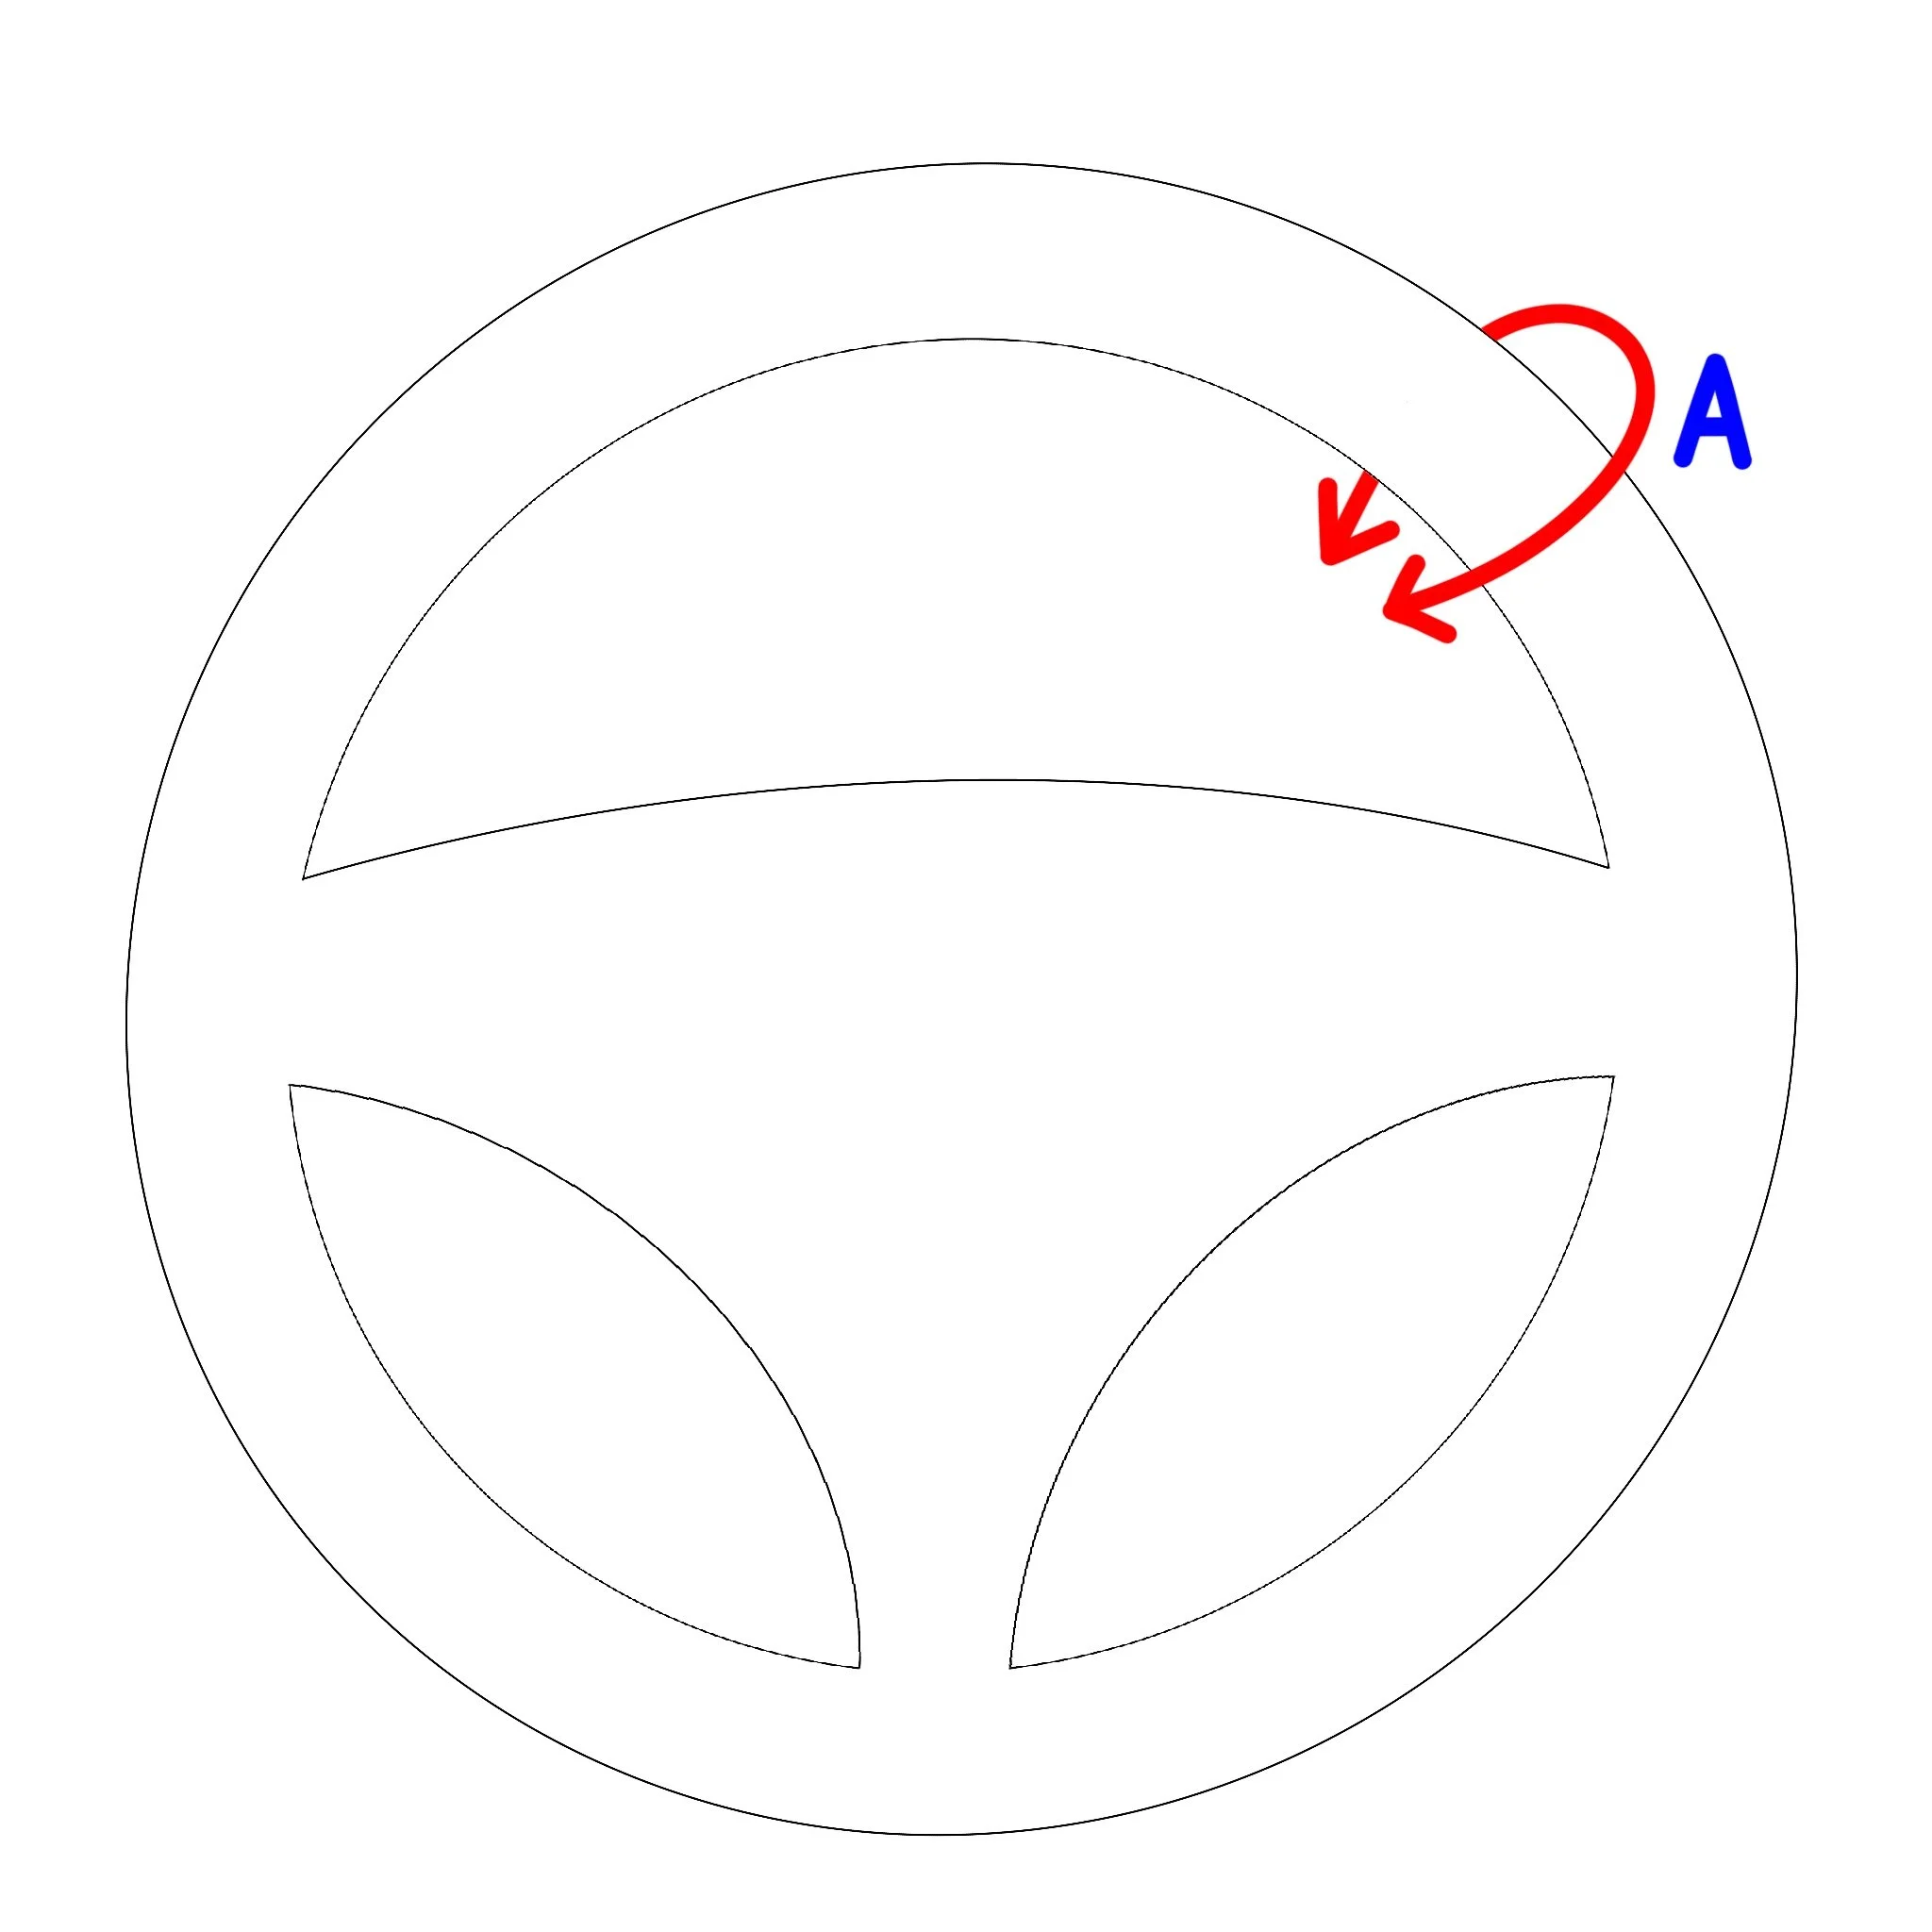
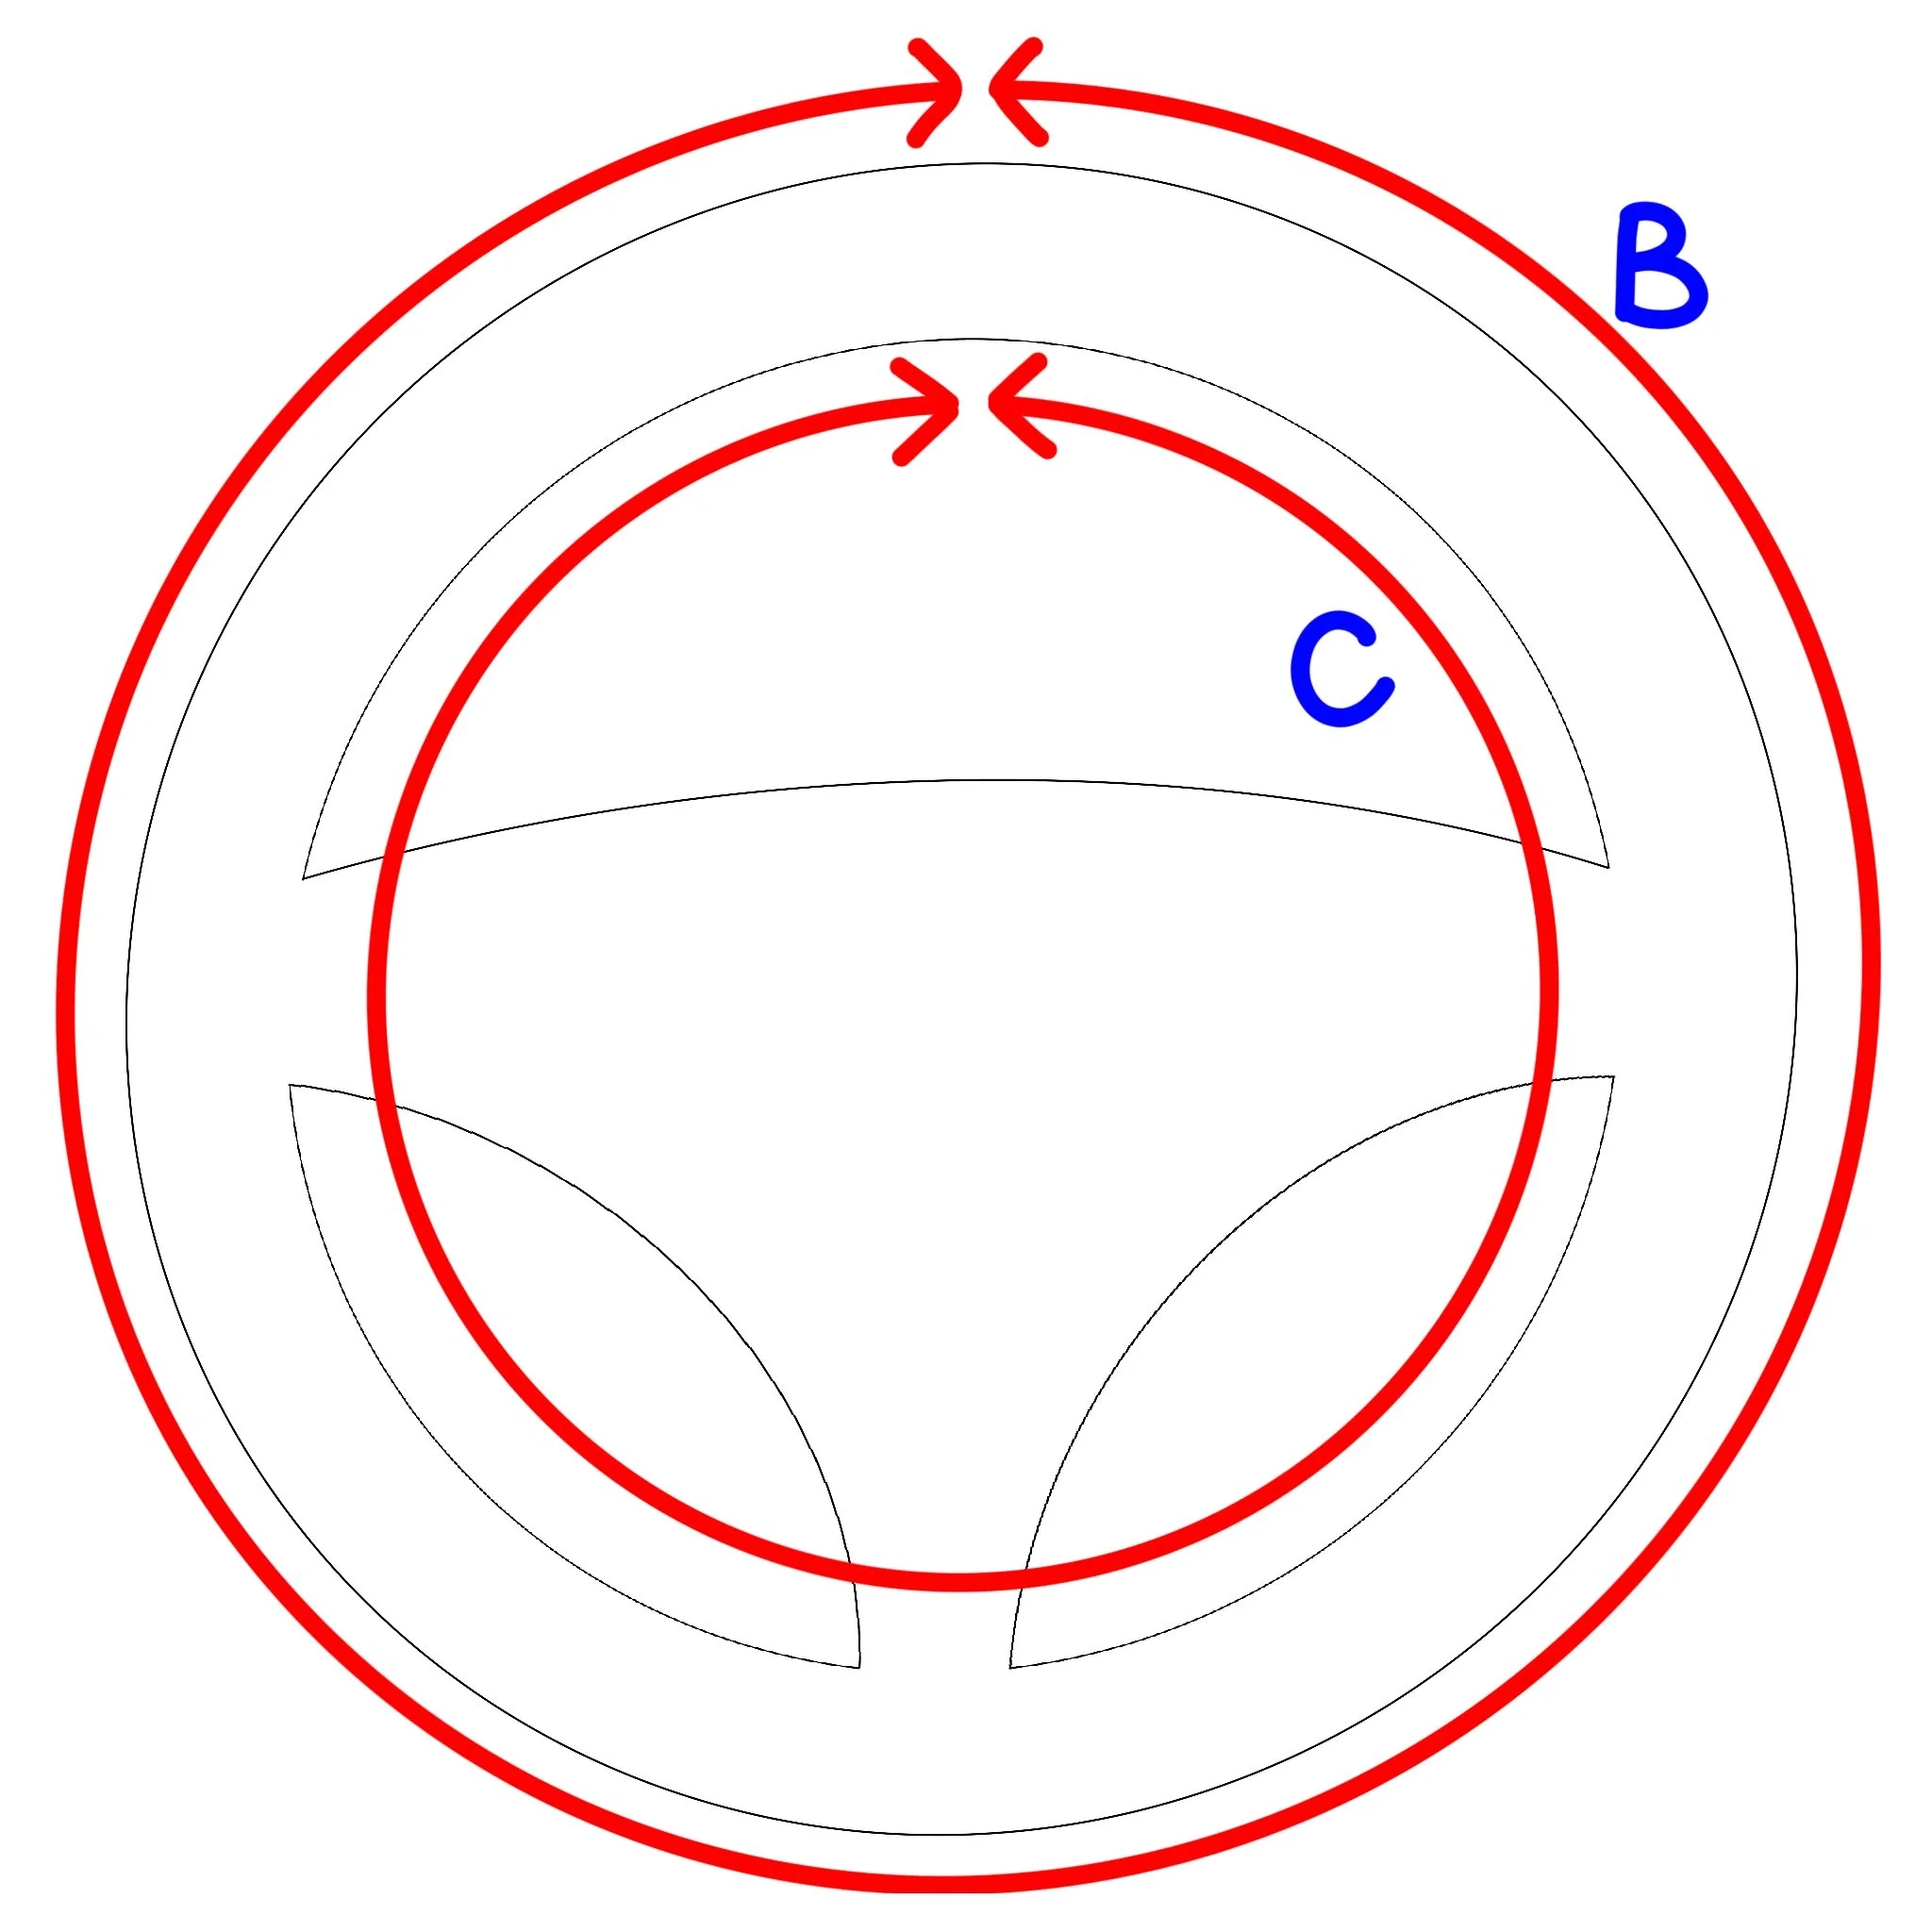
I’ve drawn some diagrams for you, to give you a simple visual of the different measurements you will want to take to get started. I’ve labeled them so I explain the purpose of each as I’m walking you through the steps of making the wheel cover.
Step 1
Measuring
Take all of your measurements and write them down.
Don’t be like me, thinking you’ll remember, then having to go out to your car again at 11 PM.
Step 2
Beginning Chain
Generally, when I am creating something that needs to be a certain measurement, I create a Foundation Double Crochet rather than a foundation chain followed by double crochet. This is because whenever I make a chain, the length always changes once I’m a few rows in. One day, I’ll figure it out, but that day is not today. That being said, you can really use whatever stitch you want. The important part is the measurement.
Measurement A - This is how long I will make my rows, from the first stitch of one row, to the last stitch of that same row.
Step 3
Repeating to the End
Once I have those initial rows established, and I’m sure the length is right. I will continue to go back and forth across those initial rows. The Steering Wheel cover is going to start to look like a long strip, almost like a skinny scarf.
Measurement B - This how long I am going to make my strip, from the first row to the last.
Step 4
Sewing the Ends Together
After I have my strip the length I need, I will fasten off with a long tail. I am then going to use this tail to sew the first row of my strip and the last row of my strip together with a whip stitch.
Step 5
Creating a clean Edge
Now that I have a lose circle, I am going to use a Half Double Crochet to create a border on both of the long edges. This border will act a sort of tunnel to string the elastic through.
Step 6
Adding the Elastic
Measurement C - Once I have the border created on both sides, I will cut two pieces of elastic, that are each the length of C minus 2 or 3 inches.
I will take either of the pieces and string one through each of the two borders I just made in step 5. This will cinch the outsides of the circular strip. It looks sort of like a huge scrunchy, and that’s exactly what you want.
Subtracting those few inches will just help the elastic to remain tights, keeping the cover more secure around the wheel.
Step 7
Sewing it onto your Wheel
This step is CRUCIAL so please DO NOT SKIP IT!
When you use a steering wheel cover, it is very important to remember that SAFETY is the most important thing. the reason you need to sew the long edges together, is because you do not want the cover to slip around the wheel, or move freely on its own.
Once I have the Steering wheel cover positioned the way I want it, I am going to take some yarn the same color as my edges, and use a whip stitch to sew them together snug, making sure to go all the way to the corners to reduce slippage as much as possible.
You can see in my photos that they were taken between my stitching together the top and bottom of the cover. I did this to display the difference. On the top, I have already sewn the two edges together and you can see that my whip stitch stops right at the corner of the airbag. On the bottom, I have not yet sewn the long edges together and you can see how much of a gap this leaves. This is a good example of why it is so important to stitch those two long edges together before driving with your steering wheel cover.
Disclaimer and Waiver of Liability PLEASE READ
By using this pattern, you agree that this project is for decorative and personal use only. The creator of this pattern is not responsible for any vehicle damage, personal injury, or accidents resulting from the construction, installation, or use of the final product. It is the user’s sole responsibility to ensure that the completed cover fits securely, does not slip, and does not interfere with the safe operation of the vehicle. Use at your own risk.